Regardless of what the size or brand your generator is, I’m sure that sometimes you reach a point when you feel you can’t bear its noise any longer, the same may also be true if you have a noisy pump or air compressor that needs quietening.
Nevertheless, generators have become an essential item in our homes because of the constant power outages.
Building a soundproof box is the best way to dampen the noise from your generator, air compressor or pump.
Can Anyone Build a Soundproof Box for a Generator?
Indeed. It’s much simpler than it seems.
The trick to soundproofing is to trap sound waves until the sound decreases in a specific space. Any dense material with texture could be considered soundproof.
I’ll be talking you through a step-by-step guide on how to build a soundproof box for a generator at home.
However, generators need air to run, so covering it completely will make it overheat, which you don’t want to happen at all!
Moreover, you need your soundproof box to be easy to assemble and disassemble.
Being portable is a plus, it becomes super easy to store when you don’t need it, as it won’t take up too much space.
What Tools Do I Need To Build A Soundproof Box?

Below is a list of the tools that you’ll need to build your soundproof box.
- Measuring tape
- A ruler
- Some paper and a pencil
- Medium-density fiberboard or MDF sheets
- Mass loaded vinyl
- Green glue sealant
- Foam mats
- Ventilation duct (you need ones with lots of bends in them)
- A circular or a table saw
- Screws and nails
- A handle
- Any type of paint
Step by step guide to building your soundproof box
The steps are straightforward. Just follow them carefully, and I guarantee that you’ll be happy with the results in the end.
1. Take the Measurements
First things first. Measure your generator, pump or air compressor so that you can ensure you build your soundproof box to the right size for it.
Use your measuring tape to get the measurements and note them down.
Make sure to add several inches to your measurements for the materials that we’ll be using for soundproofing the walls of your box.
2. Cut the Fiber Boards/ MDF Sheets
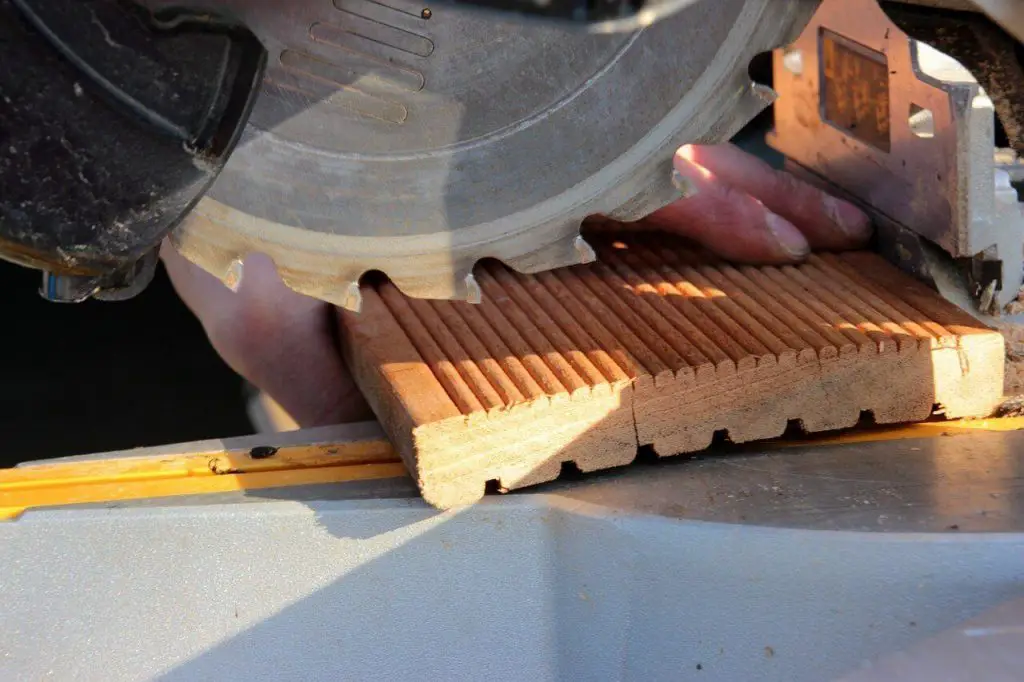
Now cut out the boards/ sheets based on the measurements that you’ve noted down using the saw.
Make sure not to cut any sides more than you should.
If you’re not so sure about them just yet, mark the measurements on the fiberboards first using your ruler and pencil, then cut them accordingly.
3. Make the Ventilation Holes
A generator needs air to run and so you now need to make some holes in your soundproof box.
Measure the diameter of your ventilation duct, and then mark two circles to cut.
The first hole you need to make has to be at the top, but more to the side rather than the center.
Now mark the second hole on the opposite side on the piece of fiberboard that will be used as a wall.
Now put down all your half complete soundproof box, making sure that all four walls are surrounding the top.
4. Add the Mass Loaded Vinyl
The main key to sound minimizing is layers of materials and free space.
Mass loaded vinyl is one of the best materials that serve this purpose as it’s a good sound insulator.
Take the measurements of your fiberboard again, and use them to cut the mass loaded vinyl that you have on hand.
Now glue the material you just cut to the inside of your medium density fiberboards.
You’ve just completed your first layer.
5. Seal the First Layer
Time to use the Green Glue sealant that you’ve prepared. Apply generously, especially on the edges.
The purpose of this step is to make sure that no gaps or holes are left uncovered that will prevent good soundproofing.
6. Add the Foam Mats – The Second Layer
Foam mats are known to be of a soft surface, and that’s what makes them very useful for soundproofing; they keep the sound from bouncing off.
So, for the second layer, mark your measurements on the foam mats, cut them out accordingly and place them on top of the vinyl layer.
Use the Green Glue again to seal the edges and ensure no sound escapes.
7. Assemble the Soundproof Box together
Now put your walls together, attaching them by using the nails or screws that you’ve prepared.
Screws should be better, in case you decide to make any changes later on, or for disassembling.
Another good thought would be to add some hinges on the corners, to give you easier access to your generator when needed.
8. Install the Ventilation Ducts
The purpose of the ventilation ducts here is to make sure that the generator will still be getting enough air to prevent it from overheating.
You want to invest in ducts that are flexible and long enough to have enough bends in them, as sound waves travel in a linear path, and bends and curves in the ventilation duct will help decrease the sound.
Tuck-in the ventilation duct into the holes that you’ve prepared in the walls of your soundproof box, making sure that they’re well placed and tight.
9. Decorate your Box

Now, for a little fun and to make your soundproof box unique in appearance, you the paint that you’ve prepared and decorate it a little.
You could even paint the exterior with soundproof paint to further increase the soundproofing levels.
For portability reasons, you could also add a handle at the top of your box.
Use a piece of the fiberboard on the inside of the soundproof box as support to your handle and screw your handle to that point.
Congratulations! You have now made your own customized, portable soundproof box for your generator.
How Does Noise Affect our General Health?
Most of us tend to think that noise doesn’t have any effect on our well-being.
The shocking news is that it has a big effect!
Getting exposed to excessive noise has been proven to cause several health problems of which are stress, low concentration levels, poor work productivity, communication difficulty issues, lack of sleep, hearing loss and many others.
According to a report released by the WHO back in 2011, at least one thousand years of healthy lives are lost each year in Europe only as a result of noise pollution.
Believe it or not, this figure doesn’t even include the noise in industrial environments.
The authors of the report also stated that other forms of pollution are decreasing while noise pollution is continuously increasing.
This is actually very interesting, as it may seem that the sounds that we aren’t even aware of hearing are the ones that affect us the most, like during our sleeping hours for example.
The human ear is one of the most sensitive parts of our bodies and never gets any rest, which means that we tend to hear many noises and sounds in the background of our lives without actually being alert to hearing them.
So, even though we’re not aware of hearing them, background noises of traffic, neighbors, music coming from the street, or whatsoever, are being processed and reacted to by our bodies in different ways through nerves that travel throughout all parts of the body and the hormones that our brains produce.
Sound is an important part of our life that, unfortunately, we can’t get rid of. However, when sound becomes noise it could affect our mental and physical health negatively.
The reason I’m bringing this to your attention is that we need to realize that noise pollution is a serious health issue and try to find realistic ways to manage it as much as possible.
What Exactly Is Soundproofing?
Sound waves are restless and would keep going on until they run out of energy.
Soundproofing mainly interrupts sound waves because its based on layers, which results in reducing the sound.
There is a common misconception that soundproofing and sound absorption are the same thing. I’ve got news for you!
They’re not. Actually, sound absorption is one of the characteristics of soundproofing.

Soundproofing is basically the process of making acoustic solutions to decrease, absorb, or diffuse soundwaves from entering or leaving a room or a specific area.
Sound absorption is applying the products that absorb the sound waves and preventing them from bouncing around in the room/ area.
Stating the facts, below are the four basics you need to know about soundproofing.
Mass
Any solid material that’s heavy and thick will block sound. To test this principle, you could simply try adding mass to the wall by using furniture and Mass-Loaded Vinyl.
Damping
Damping is successfully achieved by using what’s called “damping compounds”, like Green Glue. It’s the most effective way of dealing with low-frequency noise.
In order for the damping principle to work, apply the damping compound of your choice between two rigid panels, such as plywood, for example, and screw them together.
When the sound reaches them, it’ll provoke the shearing forces between the rigid panels which will create friction, and in turn, convert the sound energy to heat energy.
Decoupling
Decoupling is basically separating or creating a gap. In the case of soundproofing, you’re aiming at creating a gap between your plywood and the wall of the room or area you’re working on. Creating gaps disturbs the sound vibrations, which will result in reducing sound.
The soundproofing material that’s most suitable for decoupling would be resilient channels. These effectively impact the noise, as when the sound reaches them it vibrates between the channels, which prevents it from passing through the walls.
Absorption
Having already covered that final principle, I’m sure you’re well aware that the most effective material for absorbing sound is acoustic foam.
Each of these four principles works separately, but in the end, they complete each other, meaning that combining them all together will give you the best results.
Is Soundproofing an Effective Way to Reduce Noise?
Interestingly, according to an article published by the Life+Health Network, there are five ways to reduce noise pollution, and soundproofing comes second in the list.
The first one on the list is to turn off all of our electronic devices, but I’m guessing this would be difficult for most of us. Third on the list came their advice to cancel noise.
What they mean is to try and always keep a sound in your background of a relatively pleasant sound like running water or turning on a fan. Another suggested alternative is to hang a wind chime somewhere close to keep hearing it’s pleasant music frequently.
The article also refers to devices called “Noise-cancelling” devices. These devices work by using a microphone to stop the incoming sounds, then they send out “anti-noise signals”. The cheapest options to do so are noise-canceling headphones or mobile applications.

The fourth way to reduce noise pollution is to simply put on some ear plugs. Could it get any easier than that? Ear plugs will also give you better sleep at night. Just make sure you set more than one alarm and that they’re all loud enough!
The final way is to move! If it’s a possible option for you to move from your current home to another one that’s a little far from the city, then do that right away. You’re aiming at a place that’s away from industrial areas, train railways, highways and so on.
Wrapping Up
So, as I mentioned above and according to the studies made and the report issued by the WHO regarding how noise affects our general health, we should try to reduce the amount of noise pollution that we get exposed to every minute of our daily lives.
Generators are one of the many factors that produce a lot of noise because of their motors, and the bigger they are the noisier they become. Completely quieting down your generator isn’t going to be possible, because as I explained earlier, it needs air to run or else it’ll overheat.
Luckily for us, there’s a soundproofing solution for almost everything!
This simple low-budget step-by-step guide that I talked you through will reduce the terrible noise that’s coming out of the generator to a big extent. I particularly chose lightweight tools to avoid adding more weight to your generator, in case it was a portable one.
Disassembling your soundproof box won’t be a problem and you’ll be able to store it easily during the periods that you won’t be needing it.
As an Amazon Associate I may earn a small fee from qualifying purchases at no extra cost to you. This helps us run the site, so thanks for your support!
