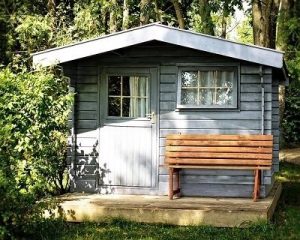
Sheds make the perfect place to house a new drum kit, guitar or massive sound system.
If you fail to soundproof your shed your neighbors may not be too excited about your new purchase.
Soundproofing your shed is necessary if you want to be able to use your drum kit in there without making enemies or if you simply want to use it as a place to reduce the sound of your generator.
Soundproofing a shed is perfectly feasible however it does have a few unique challenges. While the basic principles of soundproofing still apply, you will generally be working on a fairly basically built structure with little pre-existing sound resistance.
When you soundproof a room in a house, a garage, or a basement you normally have a solid structure to start with whereas most sheds are not as thick or solid. The wood and other materials used are generally thinner and the finish is not as perfect.
This means that there will be more gaps and more areas for sound to escape from.
That is not to say it cannot be done just that it will require a fair amount of effort. Obviously, you can call in a professional crew but that will add significantly to the cost. If you want to tackle your shed soundproofing as a DIY project, we will guide you through the options and the process.
The first step is to determine how comprehensively you want your soundproofing to be. To get it close to perfect for sound recording will be difficult and rather costly. If you want to reduce noise coming in and out you could go for a less expensive solution. You could add some mass to the structure and use foam or other ideas to absorb some sound.
Your requirements and available budget should be considered.
Things To Consider Before Soundproofing Your Shed
To properly soundproof your shed, you will have to sacrifice a fair amount of space to complete the box within a box method.
Most sheds are not very big.
Take measurements and calculate the amount of space you will lose with the soundproofing process.
You do not want to invest in the supplies and start, or even finish the project, only to find that the shed is no longer large enough for your needs.
Also, consider that the existing windows might be an issue and you might have to cover them up to achieve quality soundproofing. This will mean that more light is required. Be sure to budget for this.
Tools You Will Need
Before you get started, make sure you have all the necessary tools on hand. You will need the following:
• Tape measure
• Caulk gun
• Drill
• Utility knife
• Dust mask
• Screw gun
• Taping knife
Materials You Will Need
You also want to make sure you have all the materials necessary. You do not want delays or frustration if they are not available. You will need the following
(Depending on the exact method chosen):
• 5/8-in. drywall
• 1/2” plywood
• Carpeting or floor mats
• Acoustical caulk or silicone caulk
• Acoustical dampening adhesive
• Rubber Seals
• Window material
• Drywall screws
• Fiberglass insulation
• Acoustic joint compound
• Work gloves
Steps To Take To Make Your Shed Soundproof:
1. Seal Up All Gaps
This should be the first step and often the last step as well. For effective soundproofing, you want the area to be as airtight as possible.
Sheds, in particular, are likely to have a lot of gaps, cracks or holes. Check around door frames, windows and anywhere pipes or cables go through the wall.

Buy a good quality acoustic caulk. This product is quick and easy to use. A quality acoustic caulk is specially designed for this purpose and will remain soft and flexible allowing it to last and remain effective for many years.
2. Cover The Shed Floor
In a basement or garage, this would not be a major issue but is advisable in a shed as sound can easily escape through the simple wooden floor. Again, as above, first fill in all the gaps and cracks.
You then have two options.
Depending on your budget and requirements, you could either go for a carpet or rubber matting. Both are fairly effective but the rubber mats are easier to clean and a bit more durable. You get interlocking mats that are really easy to work with and look great.
3. Use Damping To Soundproof Your Shed Walls
Here the real soundproofing begins. One extremely effective method is the process known as damping. It neutralizes sound by converting the kinetic energy in sound waves into heat.
It sounds complicated but is actually a fairly simple process.
Effectively, all you need to do is create a sandwich effect with two firm panels and a filling of damping compound.
While there are a number of alternatives, Green Glue Noiseproofing Compound is far and away the most popular. It can be used between MDF, drywall, plywood or other rigid paneling.
You can buy readymade panels of soundproof drywall that have been made in a similar way but this is more expensive and less effective.
This sandwiching damping technique can be used to create soundproof walls as well as ceilings. The ideal solution would be the use of this double wall with the damping compound that creates a completely separate “room within a room”.
If you have this structure wall to ceiling and it is correctly done, your room will be very well soundproofed.
An important element of this structure is decoupling. You will lose a large part of the soundproofing effect if you simply add to the existing walls as this will allow vibrations to travel directly through the frame of your wall. Decoupling works by separating the two walls so that they are not directly nailed together, instead connect the inner wall to a decoupler which is then connected to the wall studs, this means that a lot of the vibration energy is dissipated by the time it gets to the outer wall.
For more information on decoupling read our article on how to soundproof a wall.
4. Soundproofing Your Shed Windows
This is obviously an important issue and most sheds will have a few windows.
A thin sheet of glass will do little to prevent noise going in both directions, in and out.
If you have built a complete room within a room as described above, you could either leave the windows out altogether or create special soundproof windows in the area where existing windows are.
First, ensure the existing shed windows have good rubber seals. Then you have a few options. There are plastic sheets that one can buy that you could glue directly onto the pane of glass.
This will make it thicker.
Another alternative is acrylic windows that provide more soundproofing than thin glass. You can also get fairly inexpensive soundproofing curtains or blankets to cover existing windows, however this will have only a minimal impact.
Also Read: How to soundproof a room with blankets.
If you are creating a decoupled room inside your shed with double walls, use thick glass for the windows and align with the existing shed windows.
Ideally, you want acoustic glass consisting of two glass sheets sandwiching a third thinner sheet for maximum effect. Make sure the new windows are perfectly sealed.
Read our article on how to soundproof your windows for more detailed information.
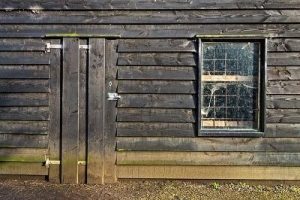
5. Reduce Sound Leakage Through The Doors
Another weak spot in many soundproofing projects is the door. Any area that is not effectively soundproofed will reduce the impact of all other efforts so do not neglect anything.
Shed doors are notoriously poorly fitting. Again, if you have created a perfect, double walled room within a room then that should have its own double door with the same insulating compound. It should also be correctly sealed with rubber.
It does, however, still pay to give the existing shed door the same treatment. Ensure there is a good rubber seal at all points where the door makes contact with the doorframe. Obviously, you also need to seal up any cracks around the doorframe with acoustic caulk.
Read our detailed guide on how to soundproof a door for more information.
6. Double Check Everything Is Sealed Up
As we said with the first step, go back again with your acoustic caulking and check there are no gaps or areas where sound can transfer. If you spot any, give them a quick seal with the caulking gun.
7. Airflow Considerations
Obviously, if you are going to make the soundproofed room airtight, you will need to ensure you have good airflow. Account for the size of the area and install sufficient inlet and outlet vents and fans.
It is not only the people that need to breathe but all the equipment used in the room will also need air. When selecting a fan, find one designed for use in that environment, in other words, a silent fan.
8. Don’t Forget To Account For The Electrics
Make sure you plan everything correctly right from the start. You do not want to go back and cut up or drill into your soundproofing when it is complete. Make sure you plan and account for all power, cabling and lighting requirements.
Makes sure that all areas where cables go through the soundproofing material are tightly sealed so that there are no gaps.
As you can see, while it is not easy to soundproof a shed, it is possible it just requires a clear plan.
Using the room within a room concept, any space can be made soundproof, even a rickety old shed full of gaps and no insulation can be made soundproof with good planning and effective implementation of soundproofing techniques.
Start with a good plan and take it one step at a time. The end result will be well worth it when you can play your new drums without upsetting people (check out our guide on soundproofing a room for drums if you want somewhere to play them during the cold winter months)!
As an Amazon Associate I may earn a small fee from qualifying purchases at no extra cost to you. This helps us run the site, so thanks for your support!
