Soundproofing your walls is crucial to effectively soundproof any room.
Walls take up the most surface area in any room so there are plenty of opportunities for sound to leak through all over the place.
Due to the size of your walls soundproofing them will have far more impact than soundproofing your doors or windows will alone.
Modern internal walls are quick, cheap and easy to install.
Unfortunately, they are not particularly soundproof at all.
The empty void inside a stud wall allows sound to echo creating a drum effect which amplifies the sound.

Mass is very important for blocking sound and stud walls have very little mass, usually their mass consists 12mm of drywall on either side of the joists and nothing more.
Solid bricks are far better at preventing the transfer of sound but some walls are too solid for their own good, walls which have been built without a cavity in the middle will carry vibrations straight through from one side to the other.
This is not great if you have a neighbour who loves loud music, loud TV, loud DIY or anything loud to be honest!
Brick walls and stud walls present different challenges and there are different ways of soundproofing them.
Cheap Ways To Soundproof A Wall:
There are many different techniques and methods to use to soundproof a wall, if you are looking for a quick, low-cost solution that doesn’t require any D.I.Y then start with the first few methods mentioned in our list below.
If you’re looking for a more long term solution then have a read of our tips below on how to properly soundproof internal stud or party brick walls:
1. Fill Cracks & Holes In The Wall
First things first if your wall has visible cracks or holes in it your first port of call should be to get these filled up.

Regardless of whether the wall is a stud wall or a brick wall, cracks and holes make it easy for airborne sound to travel directly through the wall (if the wall is fully penetrated), it also makes it easier for vibrations to travel through the wall as is reduces the amount of mass it has to get through before it can escape into the room.
Depending on the severity of the holes/cracks this can make a big difference.
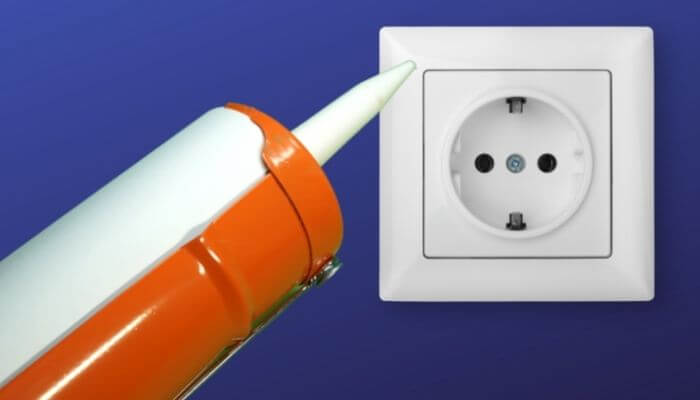
To sort cracks and holes simply use caulk to fully seal up any gaps.
2. Add Mass To The Wall
As we’ve mentioned mass is very important when it comes to blocking airborne sound.
The more mass you have between yourself and the source of the noise the less likely you are to hear it.
The most effective ways to add mass to your wall can be expensive and messy (more on this below), however there are plenty of cheap ways of adding a bit of mass to your walls that could help take the edge off your noise problem, here are a few quick and affordable methods:
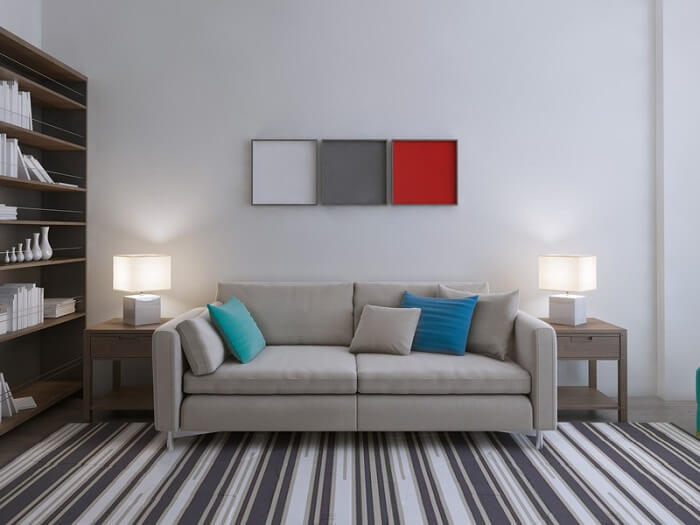
- Move furniture in front of your wall – the perfect piece of furniture for adding density to your walls is a floor-to-ceiling bookcase packed full of books, while for most of us this isn’t an option you can also utilize wardrobes and sofas to achieve a similar effect.
- Hang moving blankets (or any other dense blanket you can find) on the wall, these will help dampen vibrations that travel through the wall taking the edge off annoying sounds.
- Try using soundproof paint – yes this does exist, and no it’s not going to have a huge impact to be honest but it could be enough to take the edge off irritating background noises, it’s certainly worth trying before you spend more on getting your wall refitted.
- Use soundproof wallpaper – as with soundproof paint soundproof wallpaper doesn’t add a huge amount of mass to your wall, however it is thicker than standard wallpaper so can help soften annoying background noises.
3. Seal Up Sockets And Light Switches
If you have any plug sockets or light switches in your problem wall then ensuring that these are properly fitted and sealed can also make a big difference to the amount of sound that penetrates your wall.
Sockets are a weak point in walls when it comes to sound resistance, particularly if it is a stud wall.
This is because the plasterboard is cut to accommodate the socket, creating a weak spot that sound can more easily escape through, especially if there are gaps around the socket.
Another reason that sockets are bad news when it comes to soundproofing a wall is that the sockets are often fixed onto a stud, this means that vibrations can travel directly through the stud into the socket and out into your room.
Ideally, plasterboard and sockets should all be decoupled from the wall to prevent this from happening (more on how to do this below).
To help ensure that your sockets allow minimal noise through seal around their edges with an acoustic caulk.
If the socket is secured to a stud then it is also a good idea to attach some acoustic foam to the back of the socket to dampen any vibrations which may travel through it.
4. Insulate The Cavity
If your wall has a cavity (all stud walls will) then a simple way to make it more sound resistant is to insulate it.
This obviously requires some D.I.Y skill as you will need to remove the plasterboard and fill the cavity with fire-resistant insulation such as Rockwool.
If you want to give this a go then read this section of our article which explains it in more detail.
How To Soundproof An Internal Stud Wall
Stud walls are timber-framed so they do not bear much weight but rather divide up space in your home (a bit like a permanent office room divider).
They’re quick, easy and efficient to put together however they are not good at preventing noise from traveling through your home as they are usually hollow with no insulation.
There are many different methods you can use, ranging from creating a room inside a room (this is meant to be the most effective method of soundproofing however it reduces the space inside your room so isn’t desirable for many people) to using soundproof paint or soundproof wallpaper (both of these are not particularly useful except for very low-level noise) or simple whacking on some soundproofing panels and leaving it at that.
Our guide to turning your stud walls from echo chambers into impenetrable sound barriers won’t make your room a foot smaller but it is far more effective than just doing the minimum.
Materials Needed:
You will need the following soundproofing materials:
- Acoustic Sealant.
- Rockwool Safe & Sound – make sure you measure up carefully and get enough insulation to cover it.
- An Insulation saw.
- Resilient channels.
- Soundproofing Board.


Steps By Step Guide To D.I.Y Stud Wall Soundproofing:
Once you have assembled the necessary tools and equipment take the following steps:
- Remove the plasterboard/drywall to allow access to the inside of the wall.
- Separate electrical sockets so that there is no more than one mounted per joist. Often adjacent rooms will have electrical sockets that share the same stud, electrical sockets create small openings so if you have sockets from different rooms sharing a joist then vibrations and sound will very easily carry through. Fixing this is important before you move onto the next steps.
- Seal all openings in with acoustic sealant. This includes every single opening you can find such as light switches, electrical sockets and radiator pipes.
- Add insulation – this is the fun bit! We recommend using Rockwool insulation as it is rock based so is extremely fire retardant (it can withstand temperatures of over 1000°C!) and can be easily cut to fit around electrical outlets using an insulation saw. Try and get your Rockwool fitting as neatly as possible but don’t pack it in as this will compress the air pockets inside it making it less effective at soundproofing. Rockwool will prevent sound from echoing and creating the drum effect.
- Install resilient channels, this should be nailed across the studs.
- Screw your drywall into the resilient channels ensuring that none of the screws or nails make contact with the studs, they should only make contact with the resilient channel itself. This will cause the sound energy to be more quickly dissipated and will significantly reduce the amount of sound that gets through. If you wanted to go the extra mile you could replace your old drywall with acoustic grade drywall on both sides of the stud. Acoustic grade drywall has a much higher density than standard drywall and therefore greater mass to block sound with. If you have a very serious noise problem and are looking to make your wall as soundproof as possible there is another step you can take..
- Add a layer of soundproofing board. Soundproofing boards add much-needed mass. There are various manufacturers who construct their boards in different ways but as a general rule they will be made up primarily of high-density rubber with a drywall side to them. Make sure that when you screw them in the seams do not line up with the seams of your drywall, this will help further minimize sound transfer. When installing the boards leave a small gap of 3-5mm around the edge so that they do not touch the floor or walls, this will help minimize sideways vibration. Soundboards are very heavy so handle them with care and get help moving them!
- Decorate, refit the skirting board and enjoy your newfound peace and quiet!
If your internal wall has an air vent in it this can be a big sound leak, it’s no good soundproofing your entire wall only to have all the sound continue to leak through the air vent, so check out this article for some tips on how to soundproof an air vent.
How To Soundproof A Party Brick Wall
Brick walls will typically be the external wall on your house, you may share a brick wall with a noisy neighbor (these are also known as party walls as they are shared between two parties).

Soundproofing your external brick walls can turn an awful living situation into a comfortable one where you can sleep peacefully at night.
Brick walls present a different challenge to stud walls. They can often be far easier to soundproof as there is much less you can do with them.
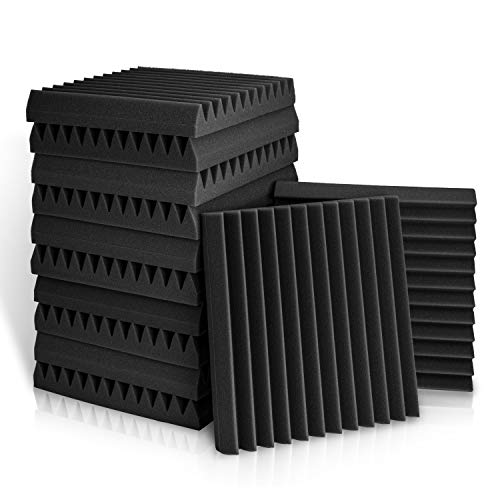
The easiest way to soundproof a party wall is to install soundproofing panels.
Soundproofing panels work by reducing vibrations, they are typically between 25mm to 40mm thick they do a great job of absorbing all the vibrations that solid walls are sometimes all too good at transmitting!
Depending on the panels you buy they will come in sizes of around 1m x 1m.
Screw them into place (you will have to cut the panels at the edge to fit) and then decorate over them and you’re good to go!
Also Read:
How To Soundproof A Concrete Wall
8 Ways To Temporarily Soundproof A Wall
Are Hotel Walls Soundproof?
Additional Factors To Consider For Recording Studio Walls Or Home Cinemas
If the reason for your soundproofing project is that you are building yourself a recording studio or a home cinema then creating a room with minimal sound distortion, vibration and echo is crucial.
Soundproofing alone isn’t enough as sound will easily bounce off them straight back into your microphone making your recording sound cheap and echoey or reducing the perceived quality of the audio of the film you are watching.
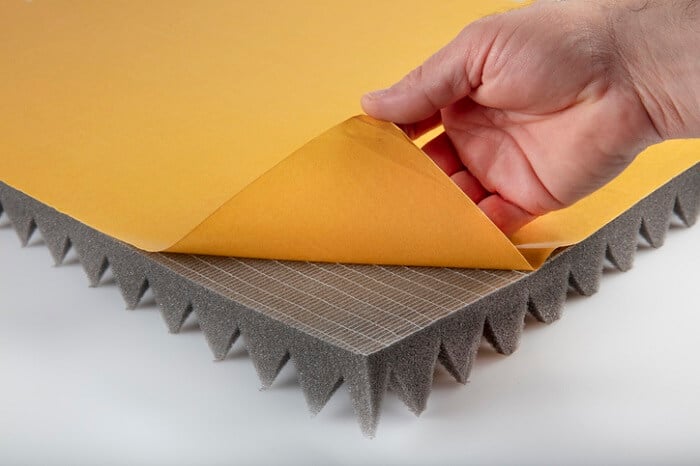
These absorb sound rather than allowing it to bounce around the room, this will give your studio the professional sounding edge that you need.
Acoustic foam will also reduce the amount of sound that escapes from a room too.
How To Install Acoustic Foam
Installing acoustic foam is quite simple, simply follow these steps:
- Carefully measure your wall and ceiling. For the best results acoustic foam should be installed on the ceiling and every wall in your room. This is because sound will bounce off everything so the more surface area you can cover with acoustic foam the better your room will be at absorbing sound and reducing echo.
- Fit cardboard panels to attach the foam to. This will prevent you from causing any damage if you decide to take the foam down in the future and because acoustic foam is so light cardboard will be more than strong enough to hold it in place. Measure and cut out the cardboard so that it will fit the room.
- Use plenty of foam tack to spray the cardboard and stick the acoustic foam to it. Don’t be afraid to use plenty of tack, you don’t want the foam panels falling off and they are only attached to cardboard so it won’t cause damage if you decide to remove them.
- Fix your panels using pin nails (small nails will do less damage to the and will easily hold the lightweight panels up).
- Put your feet up and enjoy recording music or watching a film in your new acoustically engineered room!
As an Amazon Associate I may earn a small fee from qualifying purchases at no extra cost to you. This helps us run the site, so thanks for your support!

How would you screw sound absorption panels to a brick wall?
Would there be an easier way to to this?
My brick is old and rough and uneven. What do you suggest?
Thanks
Hi Mark,
the simple way is to a drill a hole and fit some wall plugs, however screwing panels directly into the wall allows sound waves to easily travel through the screws.
A better method is to fit a decoupler to your wall and then fit the panels to the decoupler – more work I know but it will make your soundproofing project more effective!
Hope that helps,
thanks for visiting,
Dan
I have an external stud wall to the front of our house. Externally there are tiles, similar to roof tiles, then a breathable membrane, stud framework and finally plasterboard on the inside. I wish to put insulation in the stud wall, both thermal and sound. What do you suggest? I am ok with removing the plasterboard to gain access to the to the stud wall cavity.
Hey Dan,
We also share a party brick wall,
What method do you suggest we use – issue is we do not have much space to work with since our stairs are up against this party wall
Hi Albert, if you can spare 2.5cm space then it is definitely worth giving the soundproof panels ago, these will make a significant difference!