Rotating fans are a cheaper cooling and ventilation alternative to air conditioning.
However, through time, wear and tear can cause them to make buzzing or rattling noises while operating. Before you go and buy yourself a brand new quiet fan (amazon link) you should know that most fans are relatively simple machines that can usually be remedied easily, even by someone with no mechanic background.
If you’re looking for a quick solution to solve your noisy fan problem then have a look at some of the best quiet fans.
Here are some quick steps to getting your rotating fan sounding good as new.
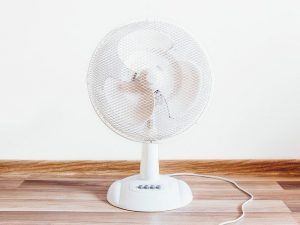
1. Keep The Fan On A Level Surface
A rattling or clicking noise may be caused by your fan’s base hitting an uneven floor. Make sure your fan is placed on smooth, level floor to avoid uneven distribution of the fan’s weight.
Noise occurs because when the blades of the fan spin, the entire weight of the fan tends to shift with it, rattling the entire system.
2. Sit Your Fan On a Rug or Carpet
If your fan still seems imbalanced and rattles despite the floor being flat and level, this may mean the base of your fan is damaged or warped. This would also cause the entire system to shift while the fan’s blades spin.
Instead of replacing the entire base, a quick fix is to place a thick sound dampening rug or carpet under the fan. This will cushion it as the weight of the fan shifts, muffling any unwanted sounds.
Also Read: How to Fix A Loud Laptop Fan
3. Clean It Thoroughly and Regularly
Your entire fan unit should be taken apart and cleaned at least once a month to avoid dust accumulation that may interfere with the fan’s moving parts. This may be causing the noise.
First, you’ll need to carefully take the fan apart.
Make sure your fan is turned off and unplugged while doing this.
Start by unlatching the front blade guard or “cage” and removing it. Then, unscrew the cap at the centre of the blades. The blades should slide right off after this.
Remove the second cap separating the blades from the back of the cage.
Then slide off the back of the cage and you’ll be left with the bare motor.
Clean the cage, caps, and blades by removing dust with a dry cloth, then washing with a damp soapy cloth.

Wipe dry afterwards.
As for the motor, wipe down the exterior with a dry cloth and you can spray canned air into the motor to clean the parts you can’t get to with a piece of cloth.
It’s important that all the components are free of dust and are completely dry when you reassemble them.
4. Tighten Loose Screws or Knobs
While your fan is taken apart, you may also want to check for any loose screws or knobs on the exterior of the motor. Simply tighten these with a screwdriver or a wrench to make sure they don’t shake or dislodge while the fan is turned on.
Do not attempt to open or disassemble the motor. Just check for any loose parts on the outside.
5. Align Fan Blades
Also while the fan is taken apart, check the alignment of the fan blades.
Uneven blades cause imbalance, which may make a whirring sound when the fan is on.
To fix this, check the blades by laying them flat on a level surface. First, check if all the bottoms of the blades are touching the surface under.
Next check the top side by placing a level piece of flat, hard cardboard or plastic sheet over the blades and check if all the tops of the blades are touching the surface above.
Some fans have metal blades. If this is the case, simply gently bend the blades until they are all aligned.
Other units will have plastic blades mounted on a metal centre. For these, you should be able to adjust the metal centre mounting.
However, if the blades are completely made of plastic, then you may have to replace the blades entirely.
6. Oil The Fan Motor

- Keeps outdoor fans operating smoothly in any temperatures!
- Any fans left without lubrication will eventually freeze and not move
- Perfect for modern or vintage fan lubrication!
You can also opt to oil the inside of the motor.
This will help the internal mechanisms glide more smoothly against each other and avoid any clicking or clunking noises. You can use SAE 20, or a non-detergent oil but use no more than two drops at a time or risk damaging the motor.
Do this sparingly, only around twice or thrice a year.

7. Replace Damaged Cushioning
Some rotating fan units have foam cushioning in between the caps that sandwich the blades.
These are specifically designed to make the fan quieter. However, when these cushions are damaged, scratched, or worn down with time, they can be the source of the noise.
Damaged cushions generally cannot be replaced once they’ve degraded so you can instead opt to scrape them off and replace them entirely with foam you can purchase at the hardware store.
Attach these with rubber or glue adhesive to where the original cushioning was, and then let it dry completely before reassembling the fan.
8. Hack The Fan Cage
If the noise isn’t coming from the base, the motor, or the blades, then the next place to look is the blade guards or the “cage.”
This cage is usually made of metal, with clasps on the side made of either metal or plastic.
These parts can warp or break with time and cause loose pieces to rattle. There are few Do-It-Yourself quick fixes to remedy this.
If the edges of the cage have warped, you can wedge a piece of thick cardboard or rubber between them to close the gap. Make sure whatever you use is thick enough to tightly fill the gap, but still has a diameter small enough that the blades don’t hit it when they start to spin.
The cage usually has a decorative cap on the front exterior centre, which can come loose with time.
You can easily fasten this back on with silicone sealant or permanent glue. You can also use these adhesives if the two plastic clasps on the side begin to crack and loosen.
For any other loose parts you find on the cage, you can always tape them back together with duct tape. When applying any of these hacks to the cage, the number one rule is to always avoid the blades.
Make sure whatever filling, adhesive, or tape you use will not extend into the cage and hit the blades, or come loose and fall in.
Foreign objects coming into contact with the blades while they’re spinning won’t only cause noise, but also possible damage to the machine and injury.
Also Read: 5 Quietest Desk Fans
If after all these steps you still hear unpleasant rattling, then perhaps the problem is already inside the electric motor. It isn’t advisable to fiddle with the motor yourself, so at this point, it may be time to contact your local mechanic…or buy a new fan!
As an Amazon Associate I may earn a small fee from qualifying purchases at no extra cost to you. This helps us run the site, so thanks for your support!

These are GREAT common sense tips few would consider. Thank you.
Our pleasure, thanks
You saved my sanity tonight because the clicking sound was about to drive me insane! Thank you!!
Glad we could be of some assistance Chloe!
Hugely helpful, thanks!
No problems Elijah, glad it helped you.