With a powerful GPU and a wide selection of high-quality games, the PlayStation 4 is undisputedly one of today’s best home consoles.
But sadly, it often irritates users with a common problem; fan noise which often gets worse over time.
As a quick guide here are the 3 best things to do to fix your noisy PS4 fan:
- Use Compressed Air to blow out dust
- Use a Vacuum Cleaner
- Open the Console and give it a deep clean
Keep reading for detailed instructions on how to do these safely and effectively.
Why Does Your PS4 Fan Get Loud?

The fan is responsible for dissipating the heat of the inner components of your PS4. The heat sensors in your console signal the fan to rotate faster when you’re playing a game with high power requirements.
Normally, the fan responds and increases the airflow, which keeps your game running smoothly and prevents your console from overheating.
The problem starts when dust particles accumulate inside and outside your console, which drastically impedes the airflow.
Your console overheats, the sensor signals the fan, so it rotates faster. But heat isn’t dissipated due to dust, so the console overheats more. It’s a vicious cycle!
Also Read: Macbook Pro Making a Loud Whirring Noise? Possible Causes & Fixes
What Can You Do?
If the reason behind your loud PS4 is dust, then you’re a lucky person! Cleaning dust is usually a simple process that you can do at home without much technical expertise.
Before starting to clean the dust off your console, turn it off and let it sit for a while to cool.
Unplug all of the cords to clean in their ports so you can freely manipulate the console.
1. Use Compressed Air
You can purchase compressed air cans online or at your local repair store.

Alternatively, you can invest in an electrical air duster if you have dust issues with the rest of your electronic devices, like your laptop (read our article on minimizing laptop fan noise), camera or keyboard.
Use a soft cloth, preferable microfiber, to wipe any dust on the external surface. This is important to do before actually using compressed air to minimize the possibility of unintentionally pushing dust inwards.
Wipe only in the left and right directions.
Wiping toward the front or the back can push the dust into the console. If you have the original PS4 model, don’t wipe toward the surface indent to avoid forcing the dust in there.
Now you’re ready to use the compressed air.
Disclaimer: If you decide to use compressed air cans, make sure to always hold the can upright. Otherwise, the fluid inside the can will be released with the air, causing permanent damage to your PS4.
Start blowing the air into the middle indent, then the front and rear ports. Avoid blowing into the disc slot as it can get damaged easily. Finally blow through the rear and side air vents.
Compressed air causes a massive temperature drop. So after you finish wait a few minutes before using the console to make sure the internal temperature returns to neutral.
Be aware that often, no matter how much air you blow into it, compressed air won’t always clear all of the internal dust without disassembling the console, especially in spaces far from the vents.
Still, it’s a good way to periodically maintain your device. We advise that you use compressed air on your console every 3-6 months, depending on how much you use your PS4 and how dusty your room is.
Also Read:
How to fix loud Xbox fans
How To Soundproof A Gaming Room
2. Use a Vacuum Cleaner
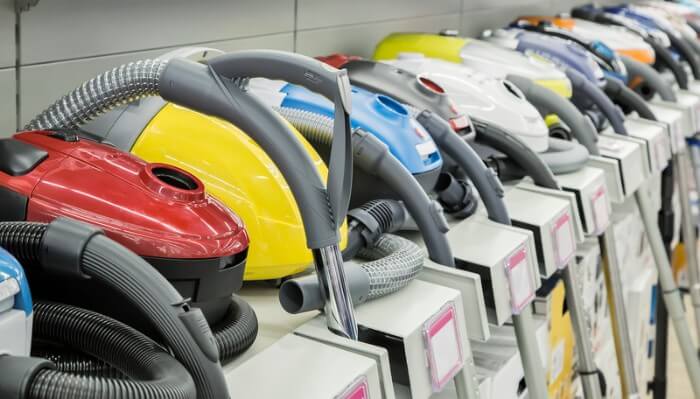
It is important that you take care when using a vacuum cleaner to clean your PS4 or any computer.
This is because the dust particles that are drawn inside the nozzle cause static electricity to build up.
When the nozzle gets close to electric components, electric current may flow between them, potentially causing damage.
Often the amount of electricity is negligible so shouldn’t cause damage yet it is worth being aware of this potential issue before giving it a go.
While a vacuum cleaner has some use, it isn’t that effective anyway as its suction power and large nozzles are only capable of removing dust which is close to the vents.
In addition, it’s not directional. No matter how much you vary the nozzle direction it’ll only clean what’s close to it, so it is not the most effective method.
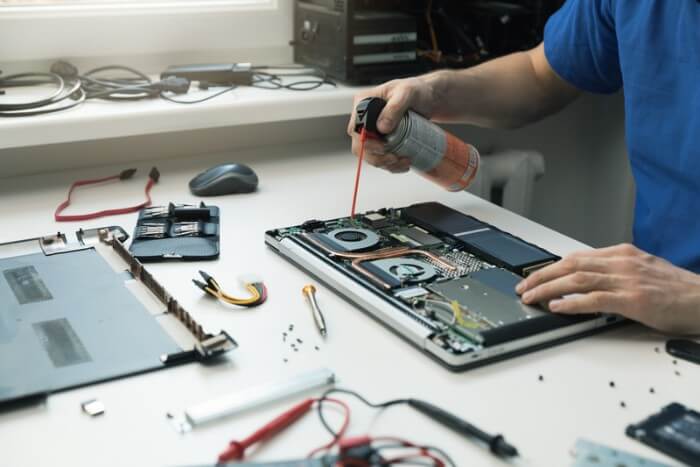
3. Open the Console
If cleaning from outside of the console didn’t reduce the fan noise then you’re left with the option of opening it.
Disclaimer: Sony clearly states that disassembling your PS4 will void its warranty. Sending your warranty-covered console for professional servicing would be a better idea than opening it yourself.
If you already passed your 1-year warranty period, you have nothing to lose.
But don’t worry, the process itself isn’t that hard.
It won’t damage your device as long as you stay gentle and stick to the instructions.
For the Original PS4
The screws on this model have a 6-point star indentation with a small protrusion in the center.
To unscrew them, you’ll need the security version of the “T8 Torx” screwdriver. You can find it online or at your local electronics store.
Place your PS4 upside down on a smooth surface to avoid any scratches. You’ll find 3 screws on the rear surface. They might be covered with plastic stickers if this is the first time they’re being opened.
After you unscrew them, store them safely because they’re easy to lose.
The bottom plastic cover should be free. Tip it up from the back and slide it forward to pass the sharp edges and wires in the front.
The fan will now be completely exposed. You can clean it by using Q-tips to remove large dust particles and compressed air to blow any remaining small particles.
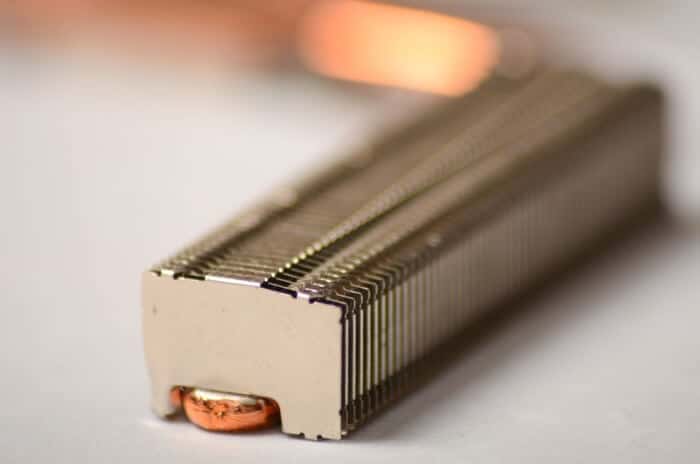
Exposing the Heatsink
If you want to clean deeper, remove the power supply to clean the heatsink underneath it.
This is where most of the dust usually collects. However, you’ll have to be delicate with this part to avoid damaging the wires.
The power supply is held with 3 TR9 Torx screws and 2 #1-Philips screws. Remove the T9 screws with a TR9 screwdriver (Amazon link).
For the other 2, use a #1-Phillips screwdriver (Amazon). Pay attention to the metal triangles under these screws. You’ll have to put them exactly as they were. Store these 5 screws in a separate container to avoid mixing them with the external ones.
Now the power supply should be free. However, it’s still connected with wires from its left side. This part is very delicate and easy-to-damage, so we advise that you don’t unplug it.
Instead, wiggle the power supply out of its place, then flip it over its left side to set it on the table, leaving the wires connected.
Use compressed air to clean through the now-visible heatsink. It’s important to hold the fan with your hand to prevent its rotation as you spray it, because this may damage its bearings.
After you finish, put everything back as it was, let your console sit for a few minutes, then enjoy!
For the PS4 Slim
This model is somewhat easier to clean than the original model. To start, remove the top cover by gently pulling its front end.
It’s not fixed with screws, but take your time to avoid causing any damage.
Once you have removed the top cover the fan will be exposed. Use compressed air and Q-tips to clean the fan.
Exposing the Heatsink
Like the original model, deep cleaning requires exposing the heatsink.
To do so, start by removing the 2 T8 Torx screws holding the metal plate above the power supply. Pay attention as you remove it because one screw is longer than the other. You should put each one back in its correct place after you finish.
Then remove the 9 screws holding the metal plate above the fan. Newer slim models have replaced some of these screws with plastic weldings. If you own this model, use a plier to slightly trim these weldings to be able to remove the metal plate.
The metal plate should be free. However, as the metal plate is secured under the power supply, you can only tilt it up from the front end. This will give you enough space to reach the heatsink and save you the effort of removing additional screws.
It’s important to hold the fan with your hand when you apply compressed air to prevent its movement. Otherwise, you may damage its bearings.
After you finish, return everything to its position and let the console sit for a while before using it again.
For the PS4 Pro
The heatsink on the PS4 Pro is more difficult to reach than with other models, cleaning it requires a lot of disassembling. We don’t recommend doing it on your own.
However, you can still clean the fan. Like the slim model, remove the top cover by pulling it from the front side.
The fan should be exposed. Use compressed air and Q-tips to clean the dust around it.
Tips for Proper PS4 Maintenance
It’ll be a waste of time and effort to go through all the cleaning process then leave the PS4 to collect dust again.
Dust is inevitable, no matter how thoroughly you clean. Here are some tips that can lower its buildup rate so that your PS4 fan remains quiet:
1. Improve Ventilation
The PS4 has a rear vent for air exhaust and two side vents for air intake. Putting it in an open area that has enough air circulation is one of the simplest ways to prevent dust buildup.
Storing your PS4 in an entertainment unit is not a good idea as dust builds up much quicker in enclosed spaces. This slowly chokes your PS4, leading to overheating and excessive fan noise.
For proper ventilation, your console should have at least a free 8-inch space all the way around it.
2. Check The Alignment
Many people think that storing your PS4 vertically will expose more of its surface to air which will dissipate heat better, however this often leads to more overheating.
PS4s have two side vents for air intake and a rear one. Placing it vertically will impede the flow in one of the side vents. Thus choking the console, outweighing the benefit of the increased exposed surface area.
You should keep your PS4 in the horizontal alignment as intended.
3. Use Dust-Proof Covers
Using dust-proof covers is a smart and simple idea to protect your console from dust, moisture, scratches and more.
They come in sizes suitable for all PS4 models: original, slim, and pro.
Disclaimer: These covers should only be used when the console is turned off. Otherwise, they’ll cause excessive overheating and possible permanent damage.
Are You Sure It’s the Fan?
Although the fan is the most common cause of PS4 noise, there are other reasons that can be responsible:
Hard Drive
The hard drive of the PS4 can get noisy, especially if it has a physical or non-physical failure.
In most cases, hard drive problems are irreversible and would require either purchasing a new drive or replacing the whole console.
Loose Parts
If you just finished a thorough clean and your PS4 is still noisy, especially a rattling noise, the problem may be from a loose screw that keeps rattling against the body.
Go back through the whole process and check that all the parts and screws are properly fixed in their places.
Final Thoughts
A loud PS4 fan doesn’t necessarily mean your PS4 is broken. The problem is usually related to a build-up of dust.

We hope this guide has helped you quieten your PS4 fan.
Purchasing a dust-proof cover is a cheap, yet effective method to save you the effort of having to clean your console in the future.
As an Amazon Associate I may earn a small fee from qualifying purchases at no extra cost to you. This helps us run the site, so thanks for your support!
