Floors are a common source of noise in buildings. If you live above noisy neighbors then the benefit of soundproof flooring is obvious, but even ground floor rooms can benefit.
This is because flooring insulated against sound not only reduces vibrations before they travel into walls and any adjacent rooms but it also deadens sound vibrations that travel into your room.

We’re going to take a look at how to soundproof a floor in different ways, so your floor can be properly protected against disturbing noise.
Below are 6 ways to soundproof a floor:
- Acoustic insulation beneath the floorboards.
- Sprung floating floor.
- Noiseproofing compound.
- Acoustic grade underlay.
- Carpet and carpet padding.
- Interlocking floor mats.
Soundproofing Your Floor To Treat Two Types of Noise
There are two types of noise that can be treated by soundproofing your floors: impact noise and airborne noise.
The two sound transmission methods need to be addressed in tandem to make sure the maximum amount of noise is reduced.
Impact Noise
Structure-borne noise is created by vibrations, usually from the impact of objects on the floor.
These can be footsteps, dragging furniture, vibrating appliances, or dropping something heavy on the floor.

Unlike walls, floors are a major contributor to impact noise in buildings due to the frequent sounds and traffic they incur.
Impact noise affects the floor below more than the room it’s occurring in, as it travels freely through the ceiling via vibrations.
Soundproofing the floors will lower the impact noise both upstairs and down.
Airborne Noise
This type of noise is transmitted through the air and includes sounds such as music, voices, the TV, and dogs barking.
Again, solutions for soundproofing the floor will help with keeping this noise within your room so as not to disturb neighbors or housemates below, as well as preventing noise from entering from below via the floor.
How To Soundproof a Floor: Where To Start
If you’re just constructing your house or converting your attic or basement, now is the ideal time to soundproof the floor while your joists and subfloors are still exposed.
However, it’s still very much possible to soundproof your floors—no matter what they’re made of—in a house or apartment that’s already built.
Most floors are built from either timber or concrete.
Concrete floors are excellent at preventing airborne noise from traveling through them.
However, noises such as heavy footsteps can create vibrations, creating impact noise that does travel through.
Many new builds now use concrete over wood for the floors due to its strength and noise-reducing qualities.
As an example, part of the build specification for The Shard in London was that all 42 floors were completely soundproof.
They achieved this using an acoustic screed isolation material in conjunction with their (many) heavy concrete load-bearing floors.
For those of us who don’t live in The Shard (or any concrete-floored apartment), we probably have floors made from wood.
These aren’t so great at stopping either airborne noise or vibrations, so they will require more work to soundproof them.
How to soundproof a floor made of wood, you ask?
Let’s take a look.
Timber Floors
Timber floors typically have cavities under them, which sounds will easily reverberate around in, making it travel clearly between floors.
To soundproof a timber floor, you have several options, including:
- Acoustic insulation under the floorboards.
- Floating floor.
- Acoustic grade underlay.
These methods can be combined for optimum results. Look below for even more ways how to soundproof your timber floor.
Wood floors also create a lot of noise when you walk across them in high heels; if this is an issue for you, then read our article on how to make your heels quieter or read our article on how to walk silently.
Concrete Floors
Concrete floors carry a lot of mass, so they are extremely good on their own at soundproofing against airborne noise.
However, they do transmit impact noise quite well. If you’ve lived below a concrete floor before, you may be familiar with the thud of your neighbor getting out of bed in the morning vibrating through the floor.
To soundproof a concrete floor, you need to add an absorbent layer to help deaden any impacts. A simple combination of underlay and carpet works very well.
If need be, you can purchase acoustic underlay, which is designed to be extra dense so that more vibrations are absorbed.
Unless you have a serious problem with impact sound, then standard underlay and carpet or interlocking mats combined with your concrete floor should be sufficient to effectively soundproof the floor against impact sound.
6 Ways To Soundproof Your Floor:
For most of the methods below, it’s best to start with a bare floor, as it’ll require the least amount of work in the long-run. It will be easier to apply soundproofing solutions both above and below it.
If you’re renting your apartment or house, make sure that any soundproofing techniques you use aren’t going to violate your lease before starting.
There are several relatively simple ways to significantly reduce sound transfer through your floors.
No matter the method (or methods) you choose, make sure there are no gaps between the wall and your soundproofing flooring to limit the sound transfer.
Depending on your budget, time, and capabilities, combining all or some of the methods below will increase the soundproofing effectiveness of your floor.
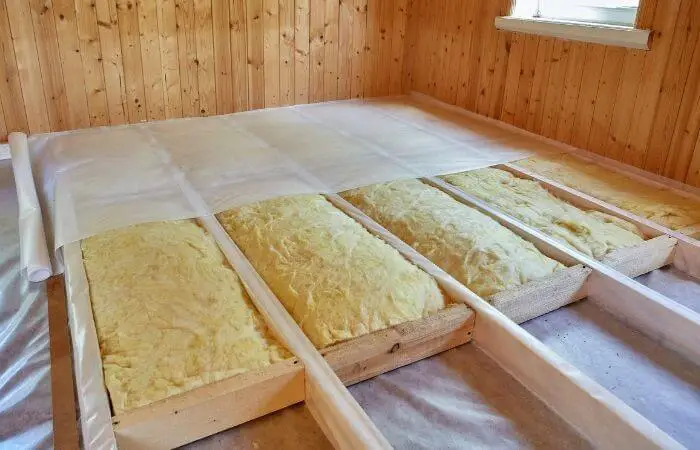
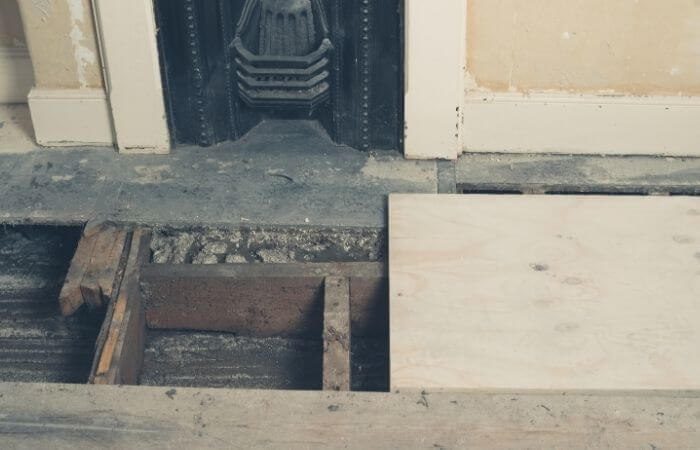
1. Fitting Acoustic Insulation Under Your Floorboards
You will need the following soundproofing materials:
- Rockwool.
- Tape measure and marker pen
- An insulation saw.
- Protective face mask and gloves.
Then follow the following four steps:
- Lift up your floorboards and measure the spaces between your floor joists. Add an extra inch to your measurement so that the Rockwool will fit snug.
- Then use the insulation saw (a knife or scissors may also work, just ensure they are sharp enough) to cut your Rockwool to fit the gap.
- Fit the Rockwool into place. Simply push it in so it sits between the joists and on top of the subfloor or ceiling panel below. There’s no need to secure it with glue.
- Once you have done this, you can replace the floorboards, and you should notice a reduction in noise.
To get the most out of your soundproofing project, you should consider turning your floor into a floating floor to get the most effective result.
You can also use acoustic insulation for soundproofing a cavity wall.
2. Using a Floating Floor For Soundproofing
A floating floor is a separate floor that’s not glued or nailed to your subfloor. It sits freely on the floor below, allowing space for movement and vibration absorption.
Floating floors sit on absorption pads and aren’t secured to the joists. This way, it helps to prevent the vibrations transferring through the joists.
How To Install a Floating Floor:
There are a few different ways to install a floating floor, including:
- A wooden basket style weave: This is an old and complex sprung floor technique.
- Cushion the floor using absorbent pads or acoustic foam/rubber: This is the easiest method, which we cover below.
- Some floors use metal springs: These are the type of floors that gymnasts use to do their floor routines on. This method is rarely used outside of gyms (read our article on gym noise-reduction for more information).
The simplest to implement and most cost and time-effective method is the second option, using absorbent pads on your joists to cushion the floor.
How To Use Absorbent Pads To Create a Floating Floor:
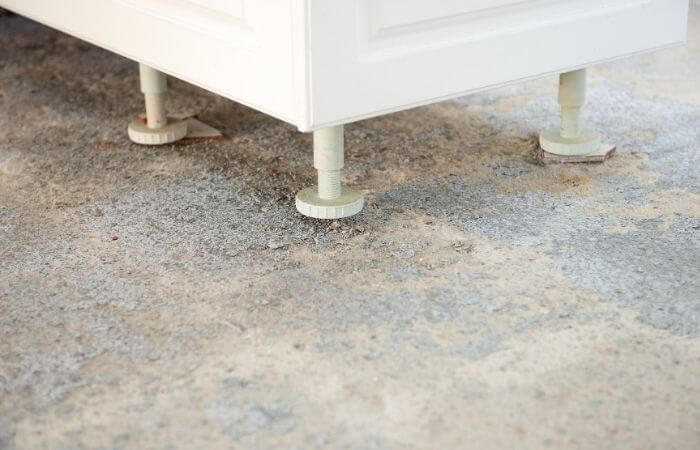
Before you start, it’s important to be aware that installing a floating floor may raise the height of your floor marginally (depending on the depth of the pads you use).
Check that you have space, and you may need to make adjustments to doorways leading into the room.
You will need:
- High durometer neoprene pads.
- Noiseproofing compound glue.
- A claw hammer.
- A handsaw or jigsaw.
Once you have gathered the required tools together, take the following steps to get your floor ready:
- Pull up your floorboards. If you also have a subfloor, you’ll need to pull that up to get access to the joists below.
- Measure across the joists and cut thin strips out of the neoprene pads to fit along the top of them. To soundproof joists they should be covered entirely with the strips (don’t try and space them out), or your floor will not sit evenly when refitted.
- Stick the neoprene strips to the joists using noise-reducing compound glue.
- Replace all floorboards, but don’t nail or glue them onto the joists; simply allow them to sit on the pads. You should also ensure that your flooring doesn’t sit flush with the wall; you should leave a quarter of an inch gap (which the skirting board will hide) to allow space for movement—you may need to trim a little off your floorboards using a saw to create this gap.
- Replace the skirting board.
- Enjoy your new quiet floor!
When your acoustic insulation and floating floor are set up, you’ll no doubt notice significant reductions in the amount of noise traveling through your floor.
To further soundproof your floor, it’s best to add acoustic grade underlay before you install your top flooring.
If you don’t want to install a carpet, then your options are limited beyond interlocking floor tiles.
We strongly recommend at least laying a rug down to help muffle the sound.
3. Use Noise-Reducing Compound
If impact noise is having a negative impact on your life, using a sound dampening compound, such as Green Glue or a similar alternative, will help soundproof your floor.
It should be used between two hard surfaces, so it’s best to add it to the existing subfloor before you place the underlay or hardboard.

It’s easy enough to apply by yourself with gloves on—the compound isn’t dangerous in any way and is simple enough to clean away.
Use a caulk gun to distribute the glue across the whole floor before laying a hardboard or underlay on top.
Then add your flooring or carpet to complete.
Noise-reducing compound usually takes up to a month to get to its peak performance of reducing sound by 90 percent.
It will strengthen the floor and leave no opportunity for vibrations or squeaks to occur.
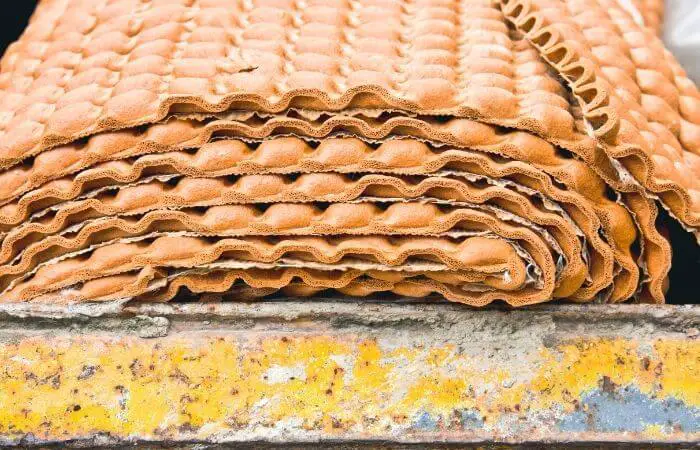
4. Using Acoustic Grade Underlay for Soundproofing
Acoustic underlay is much like its cheaper cousin, (non-acoustic) underlay, except it’s thicker and denser.
This means it can absorb significantly more vibrations than standard underlay.
It’s best to place this extra layer of insulation on a bare floor or over vinyl.
It’ll go under flooring (such as carpet or floor mats) to add an extra soundproofing barrier.
The Benefits of Acoustic Underlay
Acoustic underlay has many useful benefits on top of being a great sound insulator:
- It makes your floor softer and spongier, meaning that it doesn’t feel as firm underfoot. This also means that your flooring is better supported and therefore lasts longer.
- It helps prevent heat from escaping through your floor.
- It reduces airflow, meaning dust particles are prevented from getting into your room. This makes it beneficial for people with dust allergies.
- It dampens vibrations, making it ideal for putting in areas where you know there will be a lot of movement. For example, it can be used to help reduce treadmill noise.
How To Install Acoustic Underlay
To install acoustic underlay, your floor must feature a subfloor or paneled floor underneath.
If it’s just bare timber (lift them up, and you see a gap underneath with wires and the top of the downstairs ceiling), then you’ll have nothing to lay the underlay on.
In this case, consider installing a floating floor or using acoustic insulation.
If you do have a subfloor, then take these steps to install acoustic underlay:
- Clean the subfloor so that all dust, dirt, and moisture is removed.
- The acoustic underlay has foil on one side, which acts as a moisture barrier. Make sure to lay this side face-down on the subfloor.
- Make sure that every roll of underlay is flush with the parallel rolls, then tape each roll together with aluminum tape.
- Refit the floor and trim the underlay so that it’s flush with the floor where it meets the wall. Then replace the skirting boards so that all underlay is no longer visible.
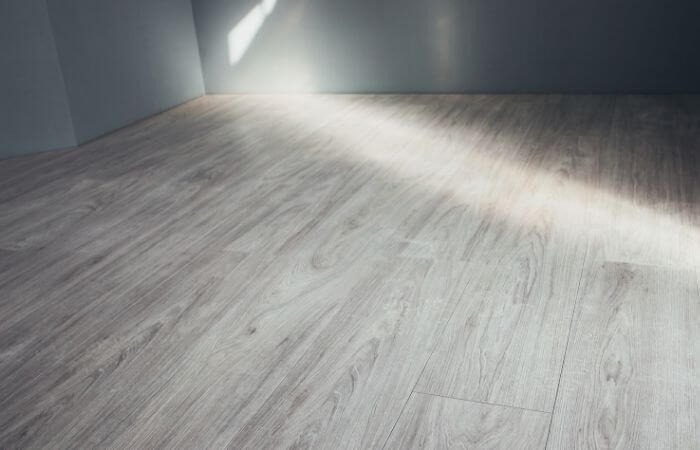
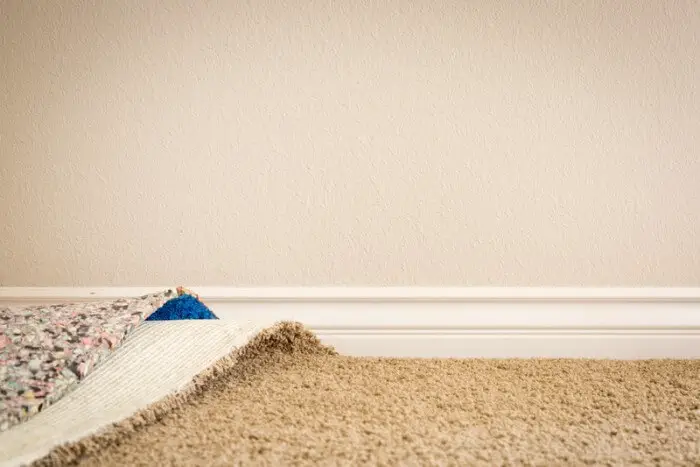
5. Lay Carpet To Soundproof the Floor
If you have bare floors, vibrations will travel easily through them as there’s no cushioning to dampen the vibrations.
Adding a rug or carpet (the thicker, the better) to your floor can make a huge difference as it will absorb sounds.
A thick, firm carpet will absorb sound the best, but make sure it’s also comfortable to walk on.
Carpet that covers the whole floor will dissipate any noise that gets through the floor.
If you like your wooden floors as they are, get a large area rug to help reduce some noise.
Adding Carpet Padding
Using carpet padding along with carpet will double the soundproofing effects, and as a bonus, add some more comfort for your feet.
Carpet padding comes in all different kinds of sizes, textures, and thicknesses.
The quality and thickness of the padding will impact your noise control and how quickly your carpet wears.
Go for denser, heavier pads for the best dampening effects—rubber is a good choice.
If you’re going for top-notch soundproofing, combine acoustic insulation and the other methods above, padding, and thick carpet to stop as much noise as possible.
Laying carpet padding is similar to laying a carpet:
- Measure your room or existing carpet to find out how much padding you’ll need.
- Roll out the material until it reaches the ends of your floor.
- Cut the padding with a knife at the edges to fit the floor space.
- Secure the padding with glue or nails.
6. Use Interlocking Floor Mats
This is a simple and cheap method how to soundproof a floor that you can use if you’re at your wit’s end.
You can combine it with other methods above, such as over acoustic underlay or insulation, or even fit it under the carpet as an extra soundproofing layer.

You’ll likely have seen these puzzle-piece mats in a gym or child’s play area before.
Not only are these mats soft to walk on, but they’re also ideal for soundproofing purposes.
They come in all sorts of shapes and sizes to match your home—fear not, they’re not all colorful and bright.
Simply cover your floor from corner to corner with the floor mats, cutting edges where needed.
Then leave it as a unique flooring, or cover with carpet or rugs if you prefer.
Additionally, you can use rubber floor mats to dampen noise created by vibrating appliances.
Simply place a rubber mat under your washing machine, TV, dryer or stereo, and lessen the impact and noise created by it.
As an Amazon Associate I may earn a small fee from qualifying purchases at no extra cost to you. This helps us run the site, so thanks for your support!

Hi,
Thanks for your website and information. Do you have any recommendations for laying engineered timber flooring onto a suspended concrete floor. Is there a form of underlay for these materials to minimise the impact sound that you reference. It’s for a small guesthouse and I want to ensure there is no noise for the guests downstairs.
With Thanks,
Terri-Ann
Hi Terri-Ann,
Apologies for the late reply,
Any form of thick, acoustic grade underlay will make a big difference, alternatively you could also lay cork or rubber matting between the concrete and timber flooring.
Hope that helps,
Dan